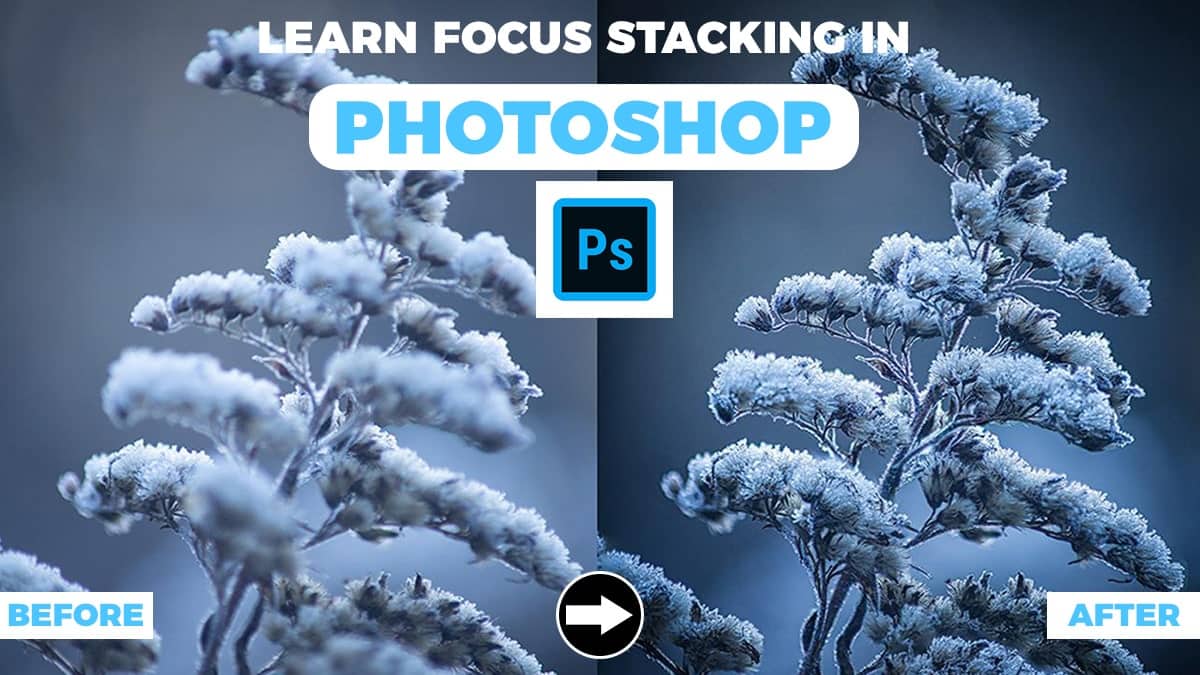
You may have noticed a scene with your eyes and asked why it appears unique in the photograph you took. Because the picture is mainly clicked with a more extended focal length or a shallow depth, not everything in an image can be in concentration immediately. Though your eyes quickly change their attention as you look from one region to another, a photograph should focus on only each zone in turn. Proficient photographic artists utilize a procedure called focus stacking to depict numerous articles in focus around different central planes in a single sharp picture where everything is in the center, basically giving a greater depth to a without losing the picture’s meaning.
Focus stacking Photoshop Elements is a vital instrument in landscape photography, item photography, macro photography, and many more different territories where a sharp concentration across the whole picture would make your photograph stick out. Focus Stacking in Photoshop’s main objective is to snap a photo of numerous focus fragments and afterward match them together into a completely in-center composite picture to give it more clean and genuine. In Adobe Photoshop Lightroom, you can center stack by utilizing Auto-Blend Layers on a few photos to make the final picture with new lines.
Tips for Focus Stacking
Focus stacking begins by stacking the pictures into Photoshop. However, the reality is focus stacking starts with the actual images, and you must click with the idea of focus stacking.
Here are some key ideas to make the ideal pictures so you’ll get the best outcomes from focus stacking.
Use camera stand
Supporting your camera on a stand won’t just forestall camera shake. It will likewise ensure that every photograph in the arrangement is taken from a similar height, position, and angle to be effortlessly adjusted later in Photoshop.
Use cable or timer
Indeed, even with your camera mounted on a stand, squeezing the screen catch can cause a camera shake. To maintain a strategic distance from it, use a link discharge, or if you don’t have one accessible, utilize the clock on your camera to defer the shot.
Take many pictures.
Ensure you make enough efforts so that each point in the scene or your matter is correctly focused in any event one of the photographs. You’ll need the profundity of the field to cover in a perfect world, starting with one picture then onto the next. The more you click, the better the outcomes you can get.
Prefer manual focusing
Try not to allow the camera to pick the center focuses. All things being equal set your focal point to manual concentration and start, and the closest point of convergence needs to be at the focal point’s base centering distance. With each progressive shot in the arrangement, turn the center ring marginally to slowly walk the field’s profundity across your scene from the closer view to the foundation. For focus Stacking Landscape photography, a center rail works best, yet on the off chance that you don’t have one, the emphasis ring on your focal point turns out great.
Recommended Read : HOW TO MASTER THE FLAMBIENT METHOD FOR REAL ESTATE PHOTOGRAPHY
Steps for Focus Stacking In Photoshop
Our eyes can focus quickly, so applying different center degrees among a few photographs needs advanced help. After you import the pictures into your system, open them as layers in Photoshop by clicking on File then Scripts, followed by Load Files into Stack; explore the picture documents and click on the OK button. Or, if you’ve effectively brought the pictures into Lightroom Classic CC, you can open them from Lightroom Just by selecting the images and clicking on choose photo followed by Edit In and then open as Layers in Photoshop.
- When the pictures are in a single Photoshop stack, select the layers present in the Layers panel then click on the Edit button, followed by Auto-Align Layers. Leave Auto selected present in the Auto-Align Layers and press OK.
- Then, choose the layers and gathering them into a folder, followed by copying that folder. If you didn’t like the automatic blend, you could do it manually in the backup copy.
- Select the layers in the folder and click on Edit, then Auto-Blend Layers. Click on the stack images appearing in the dialog and finally click OK.
Photoshop makes a layer mask for each layer that permits the keenest portions to stay noticeable. Since you have a focus-stacked picture, you can apply tone, shading, and different adjustments to coordinate with what your eyes saw when you were catching the scene.